Menu Tags and Pulsing Dot
How to set up menu tags and add a pulsing dot to highlight menu links
Menu tags have little to no impact on page speed.
Menu Tags add a minimal amount of code to your navigation, if you were to go overboard and tag hundreds of items it might have an impact on your page speed, but you shouldn't do this for other reasons not because you're worried about page speed.
Keep your menu tags and pulsing dots to a minimum, you wouldn't want your page to look like it has chicken pox.
Can I change the text for Menu Tags?
The default text included in the code provided can be changed to whatever you'd like
Helpful Links: Advanced Navigation Menus and Settings for Theme Styles
Menu Tags are set up in two steps. First, the menu tag has to be defined (what it looks like); then the menu tag has to be placed (where the tag should show).
Menu Tag Styles for POWER Theme
Theme Settings → Styling → Menu Tags
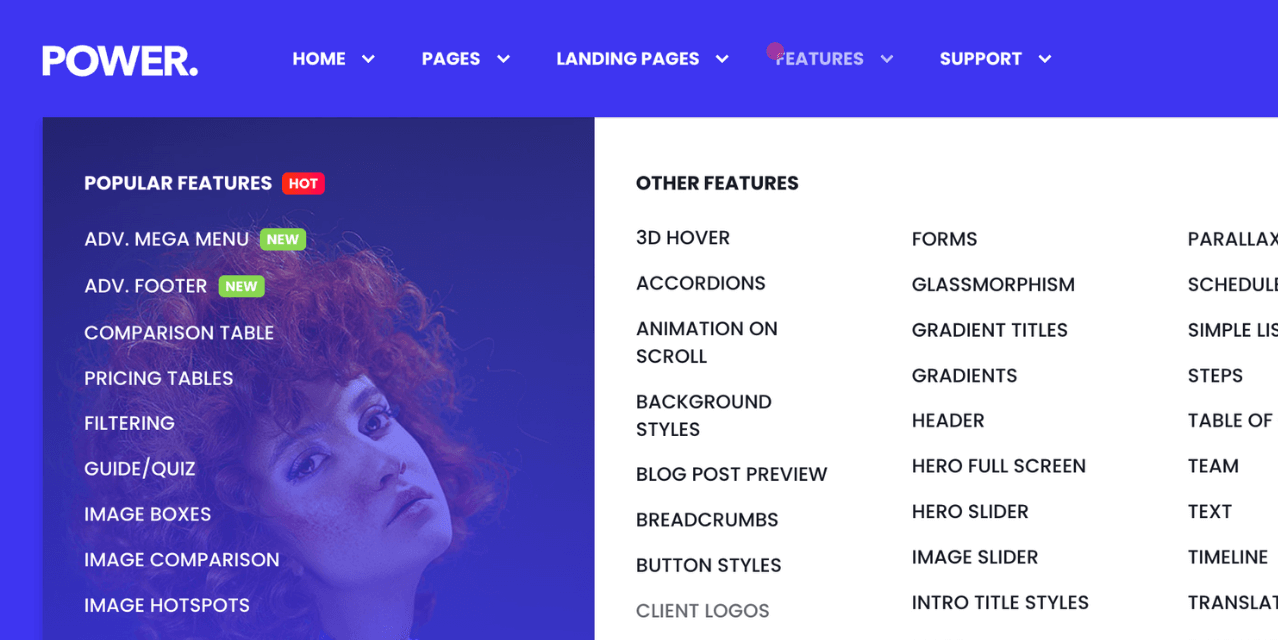
Four Menu Tags and a Pulsing Dot can be configured in the Theme Settings, which will then be applied to any menu item you have added the corresponding CSS class to.
Within the theme settings, you can choose the text and background color for each menu tag as well as the color for the dot (pulsing circle). The text is controlled in the menu settings as outlined below.

Add Menu Tags to Your HubSpot Navigation
Settings → Website → Navigation
If you haven't already created your navigation menu, refer to the full instructions for setting up navigation menus.
Once you have the menu structure established and have identified the menu items you would like to tag, you'll need to copy the corresponding code to add to your menu.
Each style that you set up in the Theme Settings has a corresponding tag that you can use.

Code for Menu Tags
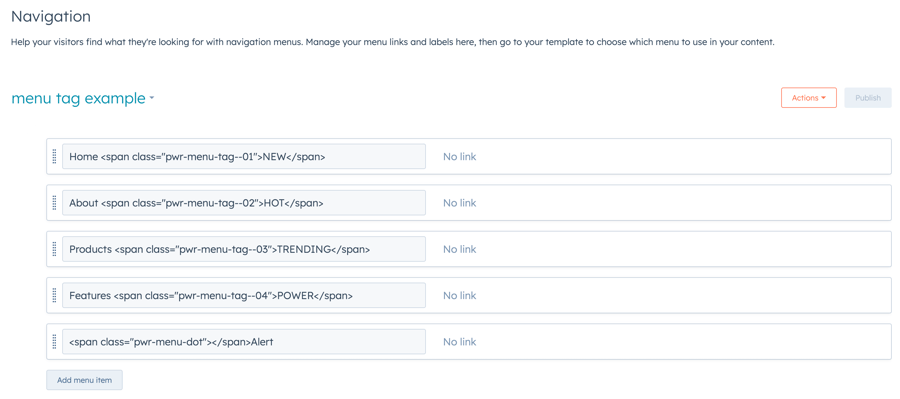
To add a menu tag to your navigation, you will need to use a span class like this:
You can change the text between the span tags, in this example, "NEW", to be whatever you'd like it to be.
The first Menu Tag class is pwr-menu-tag--01, and then for the rest, you just change the number from 01 to 02, 03, 04.
The Menu Tags can be added before your menu link text or after your menu text link. If you are adding within a child menu, we recommend adding at the end to keep your links aligned properly.
Code for Menu Dot
To add a menu dot to your navigation, you will need to use a span class like this:
The text between the tags needs to be your menu link text, the span tags should wrap the text. In this example, "Your Menu Text Here" is the menu link that you would replace with your menu item.
The Menu Dot is automatically positioned in the upper left of the menu text.


_enhanced.jpg?width=300&name=pwr-entry__hero-bg-(1)_enhanced.jpg)


