
Setup Instructions
Blog Templates Overview
POWER Theme includes three blog templates:
- Blog Listing template (archive/index page)
- Blog Post template (individual posts)
- Blog Author template (author archive)
Setup requirement: Blog Listing and Blog Post templates must be configured manually. Blog Author template applies automatically.
⚠️ Important warning:
If your blog is currently live with another theme or template in HubSpot, completing these steps will immediately change the appearance of your blog.
How do I select templates for my blog?
Settings → Content → Blog → Templates

Blog Post Template
- Below the Blog Post Template, click Actions
- Click Change Template
- Choose your child theme from the list [POWER x YOURCOMPANY]
- Choose the Blog Post Template
- Click Done
Blog Listing Template
- Below the Blog Post Template, click Actions
- Click Change Template, this will open the settings tab of the Blog Listing Page
- Click Advanced options to expand the settings
- Scroll to the Template section
- Click the Use different template button
- Choose your child theme from the list (POWER x YOURCOMPANY)
- Choose the Blog Post Template
- Click Done
Additional settings in HubSpot for your Blog Listing page:

Choose Layout for Blog Listing Template
Settings → Content → Themes → [your child theme]
The layout options for the Blog Listing page are located in the Theme Settings.
Blog → Blog Listing
The options include:
- Show Filter Bar: Shows/Hides the bar containing the blog categories/tags
- Layout: Choose between a 1 column, 2 column, and 3 column layout option
- Show Blog Post Author?: Displays the author name in the blog post previews, if activated.
- Show Blog Post Date?: Display the date in the blog post preview, if activated.
- Show Blog Post Reading Time?: Display the estimated (internally calculated) reading time of the blog post, depending on the length of the blog post content.
- Show Blog Post Summary?: Displays the excerpt text on the listing page.
- Get Summary from…: offers to pull the excerpt text either from the blog post directly or from the meta description of the blog post, which will be defined in the settings of the blog post editor.
- Truncate Summary: limits the length of the excerpt text to a given number.
- Pagination: We have provided the standard pagination method with arrows and a modern way of loading more blog posts by clicking on a “load more” button.

Blog → Blog Post
The options include:
- Show Navigation Bar: Shows/Hides the navigation bar for jumping to the next/previous post or blog overview.
- Show Related Posts: Shows/Hides the related posts section below the main blog post body.

What are Blog Post Template Options?
Blog Post Template Options Overview
Additionally, you can configure the blog posts directly in the blog post template or blog post (content editor).
Blog Comments are included in the template and visible in HubSpot by default. Comments can be turned off from the Blog Settings, as well as configuring the options related to how comments are managed.
Once you have set up a blog post you will find several modules in the left sidebar of the content editor in HubSpot:

What Blog Post Header settings are available?
Blog → Blog Post Template → Blog Post Header
- Layout → Choose Layout
Choice of Full Width or Boxed - Layout → Show Blog Post Author
Activating this shows the Author name/link in the post header. - Layout → Show Blog Post Date
Activating this shows the Date in the hero (and makes it available for the Blog Listing Template).
Adjust the date format for your blog in HubSpot settings - Layout → Show Blog Post Reading Time
Activating this shows the "minutes read" in the hero. This calculation is based on 200 words per minute. - Style → Color Scheme
Choice of Light or Dark.
Tip: If you change the background color for the module, the definition of Light Color scheme is a light background with dark text and Dark Color scheme is a dark background with light text. Based on your background color, you would need to toggle the color scheme to ensure the text color displays properly and is legible.
- Style → Background
Choice of Background Color, Background Image/Video, Background Gradient, or Transparent. Refer to Settings that apply to all Section Modules for more details about these choices.
There are 3 options to overwrite the Featured Image within the Blog Post Header (the featured image will still be used for social sharing, etc.)

- Style → Overwrite Post Image
If you would like to replace the header image, we recommend using a width of at least 2000 px.
- Style → Overwrite Post Image
If a custom video (*.mp4) is configured here, it will overwrite the background image. Please make sure that the file size is not too big. A general rule of thumb is to keep reducing the file size until it starts to noticeably be degraded. Try to export videos in 720p and with a bitrate under 700kb/s ( preferably 500kb/s ).
- Style → Overwrite Post Image
Enter your Youtube Link or ID. This will overwrite the previously configured background image or custom background video *.mp4
- Style → Background → Background Position / Parallax Effect
For the Image, you can choose where the focal point is within the content area. This will determine how the image is resized for smaller screens to ensure it is responsive and your content has the desired layout.
You can also choose to enable the Parallax Effect which will scroll the image within the content area as the site visitor scrolls on the page.

- Style → Background → Background Image Overlay
Option to add an overlay to the background image, as a single color or gradient.
Setting the opacity for the color or gradient is required to see the image through the overlay.
For the gradient option, you can either set an opacity per gradient color or an overall opacity for the entire gradient.

- Standard Text / Translation → Read Time Text
The default is "%s min read", where %s is the placeholder for the number of minutes that particular blog posts needs to be read.
Blog → Blog Post Template → Previous Next Navigation
Previous, Home, and Next Links are automatically configured for the Blog.
Note: This module can be added to non-blog pages and configured manually, how to configure the Previous Next Navigation.
Blog → Blog Post Template → Blog Post
- Social Sharing → AddThis Script Link (DEPRECATED)
Oracle discontinued AddThis on May 31, 2023 and the setting was deprecated in the v29 update.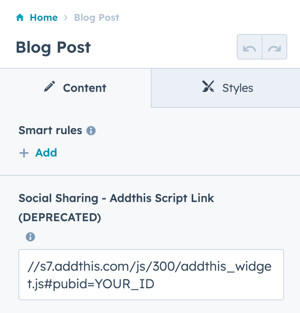
- As an alternative, follow these steps to set up ShareThis.
- Settings → Blog → Social Sharing → Social Sharing Buttons
- If you use ShareThis, please make sure to deactivate all HubSpot social sharing buttons for your blog in the settings.
- Layout → Float AddThis Social Sharing Items (DEPRECATED)
This setting was also deprecated in the v29 update and replaced with the embeds.html configuration.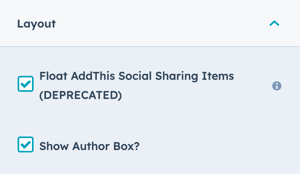
- Layout → Show Author Box?
Activating this shows an author box at the end of the blog post.
Example of blog post with Author Box and new ShareThis sticky embed:

Blog → Blog Post Template → Blog Post Preview
Additional blog posts are automatically included below the blog content.
Full overview and detailed setup instructions for Sec Post Preview module.